Create a class
Using the course creation wizard, instructors and organizations can create courses. Course creation wizards can be accessed through “Create course” in the header or “Instructor panel/ Classes/ New”
The course creation wizard includes 8 steps that should be passed for a class to be created.
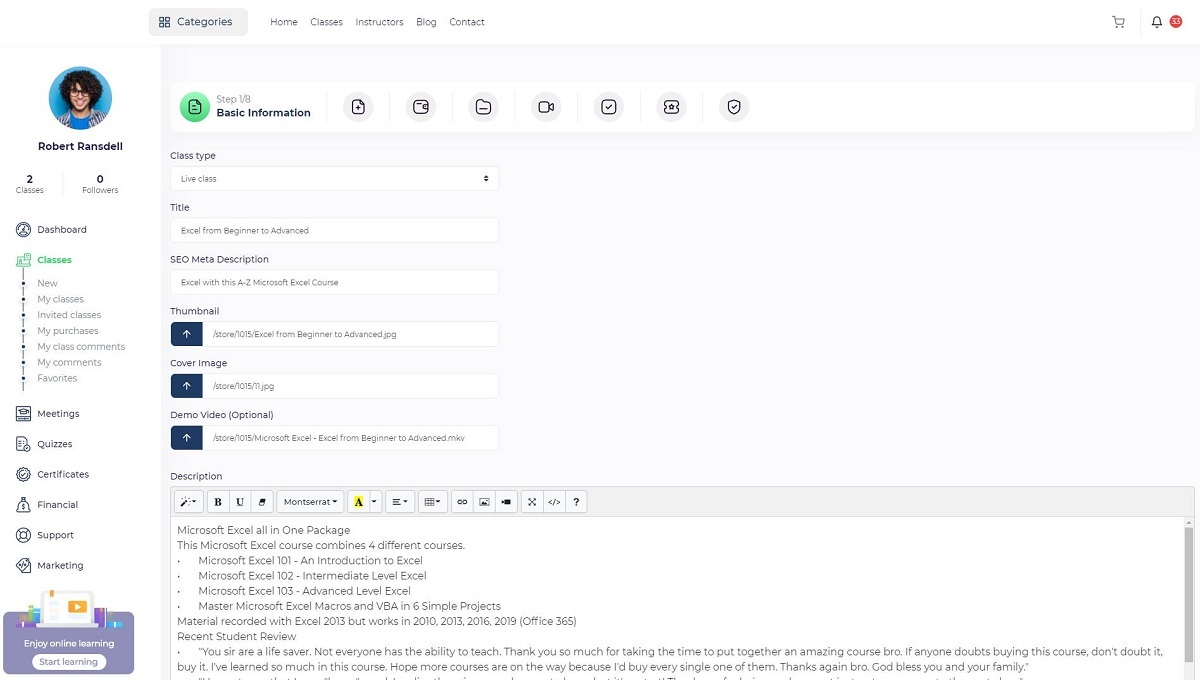 Step 1 – Basic information:
Defining the class's general information will take place in this section.
Class type:
Live: Classes are conducted live through live class providers such as Bigbluebutton, Zoom, Google meet, etc.
Course: The courses are offline (like Udemy classes), so they include prerecorded video files that students can access after enrollment.
Text course: A text course is a course with a lot of text material. There will be a separate page for each lesson.
Note: All class types include downloadable files and attachments in different formats, so there are no restrictions on class attachments.
Title: Class description in a few words. A maximum of 64 characters should be used for the title, which explains what the class is all about.
Seo description: Describe the course in 150 to 160 words, which will appear on the search engine result pages. On the website, it won't be visible.
Thumbnail image: This is the main image that will appear on the class cards. A preferred size is 360x250 pixels.
Cover image: The cover image will appear at the top of the course page. The preferred size is 1920*530 pixels.
Demo video: You can define a demo video for a class, and when a user clicks on the thumbnail, the video will be displayed.
Description: A description of the course will be displayed on the class page, including information about course educational material, instructor, and other relevant information that will motivate viewers to enroll. A minimum of 300 words should be written for this page because it is one of the most important SEO requirements.
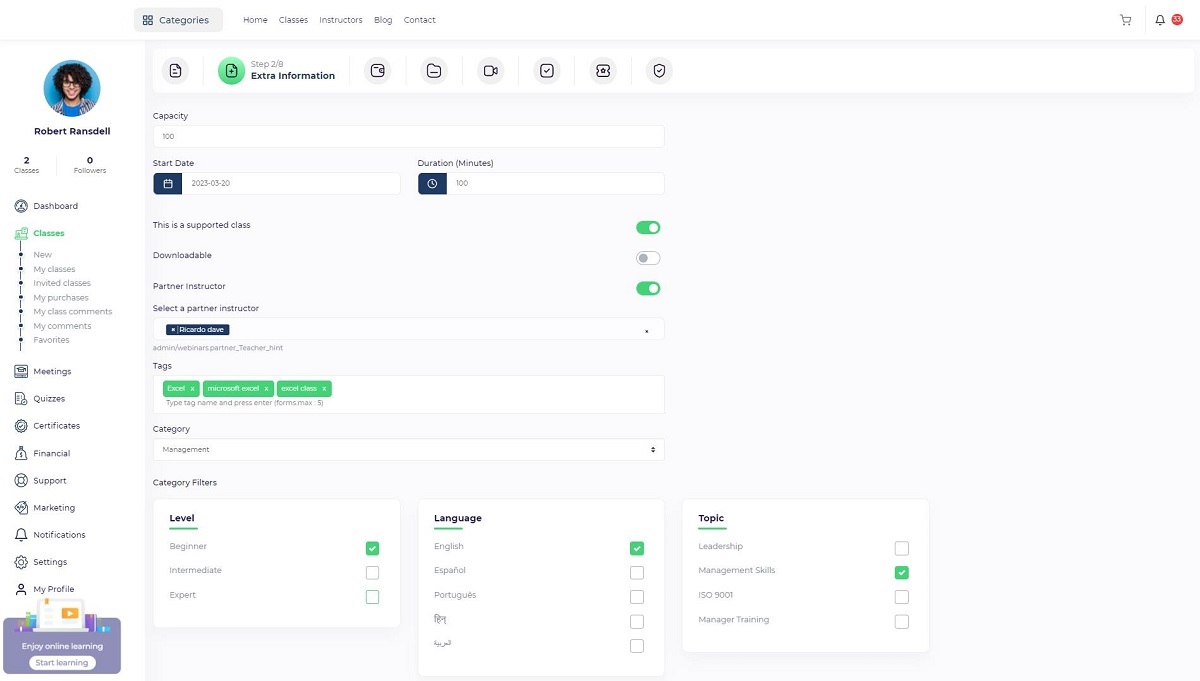 Step 2 – Extra information:
There are different steps for each type of class (Live, Course, Text course), so we will explain each one separately.
Capacity (Only Live Classes): Each class can host a certain number of students. This means that you can create classes that have a capacity limit. Upon reaching a class capacity, registration will be closed. On the course card, a progress bar indicates the class capacity.
Start date (Only Live Classes): The start time of the live class. Users will be able to purchase the live class until this date, and after this date, registration for the live class will be closed. All live session dates should be set after this date.
Duration: The duration of the entire live class. The user can see the duration of the live class on the live class page.
Support: By turning on this option, students will be able to send support conversations through their panels, and an instructor can review and respond to their requests.
Course support status will be displayed on the course page sidebar, making this a competitive advantage.
Downloadable: If you want to allow users to download course material like videos, you can enable this option. On the course page, the user will see this button indicating that your course is downloadable.
As you can enable or disable downloads for each part of the content, this toggle just specifies whether the course can be downloaded or not and will appear on the course filter page.
As an example, if you have a course where you don’t want to allow students to download videos but some projects, assets, or materials that you want them to download, you should turn off the “Download” toggle button.
If you have a live class and you want to allow users to download all of the recorded sessions after the live class ends, you should turn this toggle on.
Note: Downloads will not be disabled by this toggle button, and you can also enable or disable downloads by defining a file. How do I do it?
Partner instructor: You can add one or more instructors to your course by turning this toggle on. The partner instructor dropdown will display and you can select one or more instructors to add. The invited instructor's profile will appear on the course page, and the invited instructor can view the course through the “Instructor panel/ Classes/ Invited classes”section.
Tags: A tag will help users find related content in the courses. The tags will be displayed on the course page, and users will be redirected to the tag page when they click on the tag. The tag page will display all content related to the tag.
Category: If you select the course category from the dropdown, the category filters will appear in the related cards.
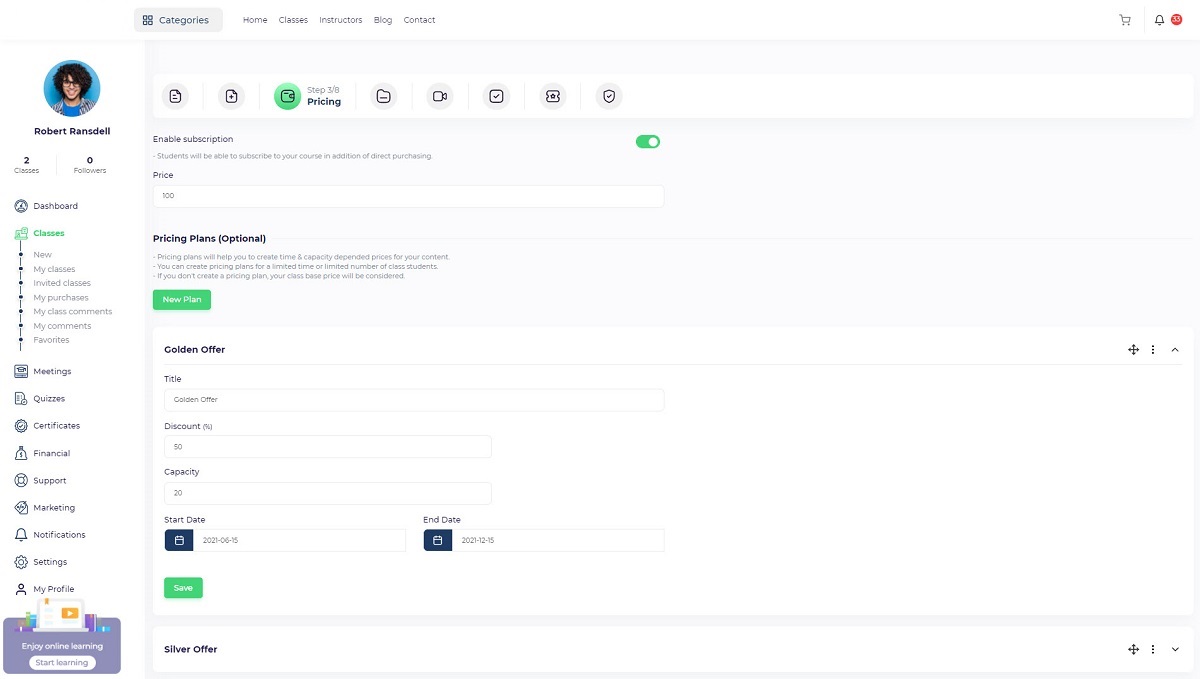 Step 3 – Pricing:
Subscribe: Using the subscribe feature, the student can enroll in the course without having to purchase the course directly, if the toggle labeled “Subscribe” is toggled on.
Price: The class price represents how much the user should pay to enroll in the course. If you want to publish a course for free, enter “0”.
Sales plans: Price variations can be used to encourage users to enroll in the course based on different parameters.
There could be different sale plans based on the number of students in the course and the start date.
Note: If you define a pricing plan for a live class that includes capacity, the remaining capacity will appear at the bottom of the input.
Examples:
Students who register first will receive a 30% discount.
During the first two days after the class was published, there is a 50% discount.
Five students who enroll on the first day of publication will get 20% off.
A list of course pricing plans will appear on the course page, and users can enroll in the course using them. Pricing plans are disabled when their capacity is reached or the expiration date passes.
Note: Course pricing plans provide an option for selling your course without this feature. Discounts will be applied to the course price.
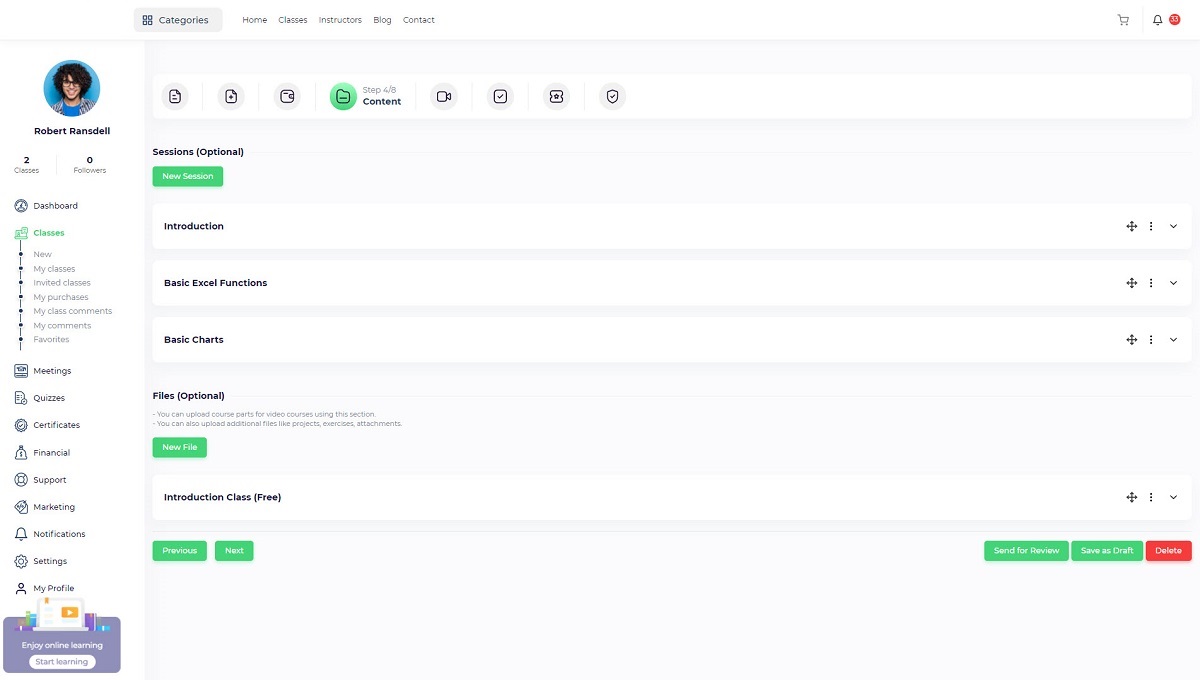 Step 4 – Contents:
- In the course creation process, this is the most important step. The course materials, such as videos, files, projects, live sessions, assets, circulium, etc, will be uploaded by this step, depending on the type of class (live class, course, text course). We will explain different types of content that can be used for course content.
- It is possible to categorize different class contents using class sections such as live sessions, files, or text lessons.
- When you define a class, you can create sections and assign class educational materials to them.
- A section will be displayed on the general list if it is not assigned to content.
- There is the option of assigning quizzes to specific chapters. Whenever you assign a quiz to a section, it will appear at the bottom.
- A quiz can be assigned to a section from the quiz creation/editing form.
Live class contents:
There are two types of content that can be defined in a live class:
A-Live Class sessions: Adding a live class session is as simple as clicking the “Add session” button and filling out the required information.
API: You want to use this system to conduct the live class. Zoom and BigBlueButton are integrated into the system, or you can use any live meeting provider.
Link: A URL generated automatically by Zoom or BBB that the student will be able to access during the meeting.
Password: In case your meeting provider requires a password for joining live classes, you should define it. The password will be displayed to students.
It will be automatically generated if you are using Zoom or BBB via the platform API.
B- Files: A file can be used for video course parts, projects, assets, etc. If you want to add a file, click the “Add file” button and fill out the required information.
Accessibility: A user can access “Free” files without purchasing the class. To access “Paid” files, students must enroll in the course.
Source: Choose the YouTube or Vimeo radio button and select “Local” for files that you want to upload from your computer.
Description: Detailed descriptions for each file will be displayed in the class page.
Downloadable: To allow users to download the file, turn it on, and to allow users to play the file, turn it off.
Activate this option if your file format is not video.
C- Text lessons: The “Text course” option in the first step allows you to define text lessons as course parts.
Title: A lesson's title will appear in the header of the lesson page and in the lessons list.
Study time: An estimate of how long the text lesson will take to read.
Image: The image that will be displayed on the lesson page.
Accessibility: A user will be able to access “Free” lessons without purchasing the class. To access “Paid” lessons, the student must enroll in the course.
Attachments: If you want to assign predefined attachments to a text lesson (Projects, related files, etc. ), you should define course files and select them from the dropdown list. Attachments related to the lesson will be displayed on the lesson page..
Summary: On the course page, you will find a brief description of each lesson.
Content: On each lesson page, the text course content will be displayed. It supports HTML content.
New file source type introduction :
Google drive: Google Drive can be used as a file storage host.
If you use google drive source type for your files, you need to use embed code.
First, preview your file on google drive
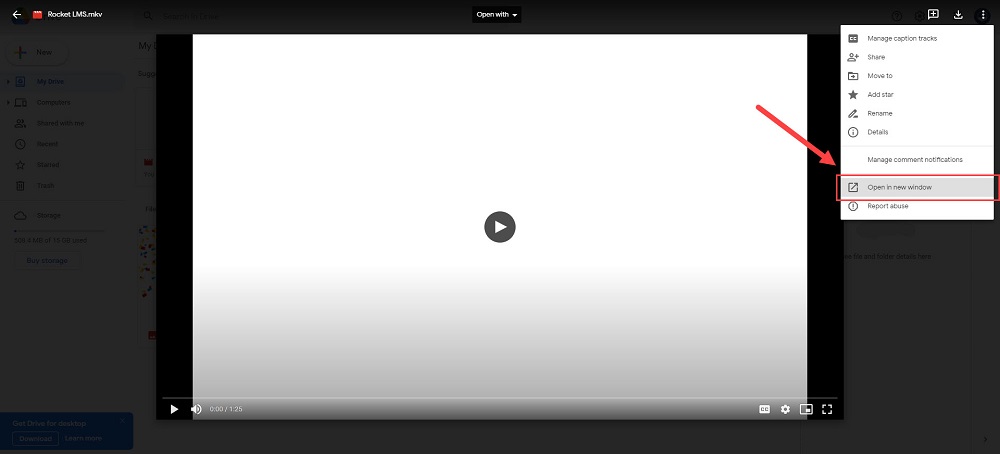 Select open in a new window.
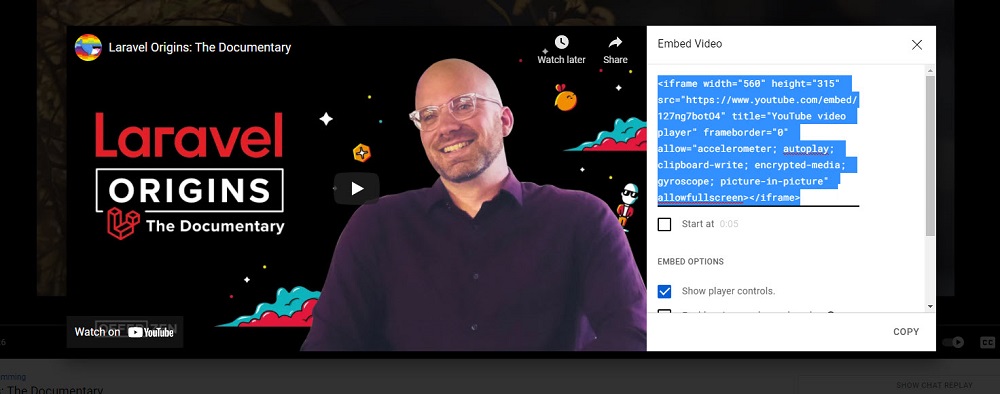
A new tab will open, then select embed and copy embed code in opened modal.
Note: make sure your file is shared with everyone.
 iframe: you should copy the iframe code and copy it without any changes .in some websites iframe code is labeled as the "embed" option.
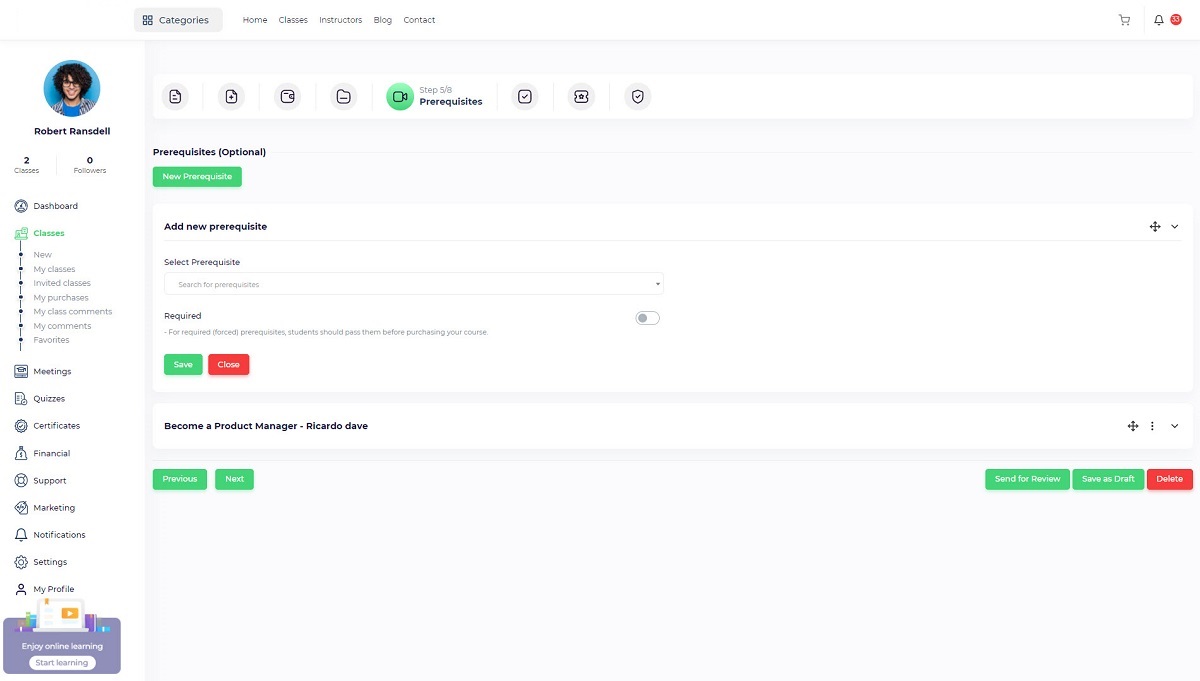 Step 5 – Prerequisites:
On the class page, prerequisites will be displayed. There are two types of prerequisites:
A: Required: It means if a student wants to enroll in a course, they must pass the prerequisite.
B: Optional: A prerequisite is just for the user's information, so they know that it is better to learn those courses and are not required to pass.
A prerequisite can be added by clicking the “Add” button and searching in existing courses. To add a “Required” prerequisite, turn on the toggle button.
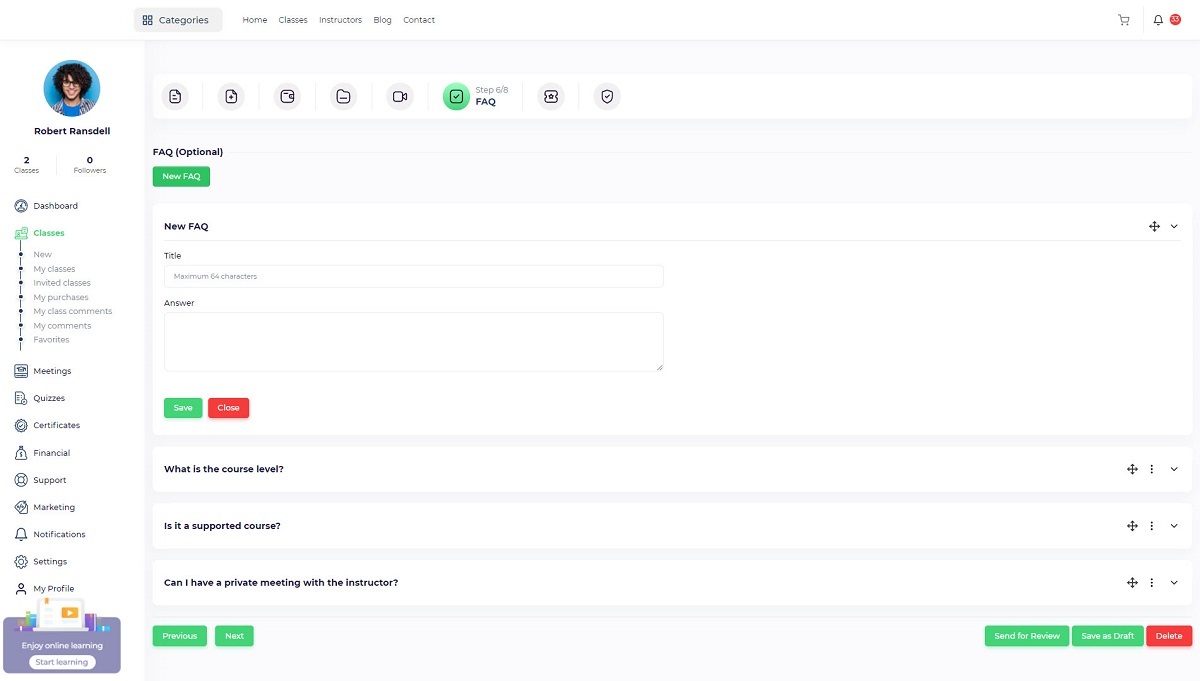 Step 6 – FAQ:
The FAQ items will appear on the course page as expandable accordions. An FAQ item contains a question as well as an answer.
Click on the “Add” button and fill out the required fields to add a new FAQ item.
 Step 7 – Quiz and certification:
Quizzes and certificates can be added to courses using the course creation wizard.
You can add a quiz by clicking the “Add” button and filling in the required fields.
Quiz title: This will be displayed on the class page.
Time: Duration of the quiz. As soon as the quiz duration has passed, the quiz will be finished and the result will be calculated automatically.
Attempts: To allow a student to attempt a quiz several times, you can specify attempt times.
Pass mark: If the quiz includes a certificate, the student will receive the certificate upon passing.
Certificate: Turn this toggle on if a quiz includes a certificate.
Active: Turn it on to display the quiz on the course page.
Once the quiz has been saved, you can define quiz questions. Then click on “Add multiple choice” and “Add descriptive” and define your questions.
For multiple-choice questions, you can use images and texts as answers.
In order to avoid errors, it is important to define a grade for each question.
If descriptive questions are used, define a correct answer so that the student can view it once the quiz is over and all attempts have been made.
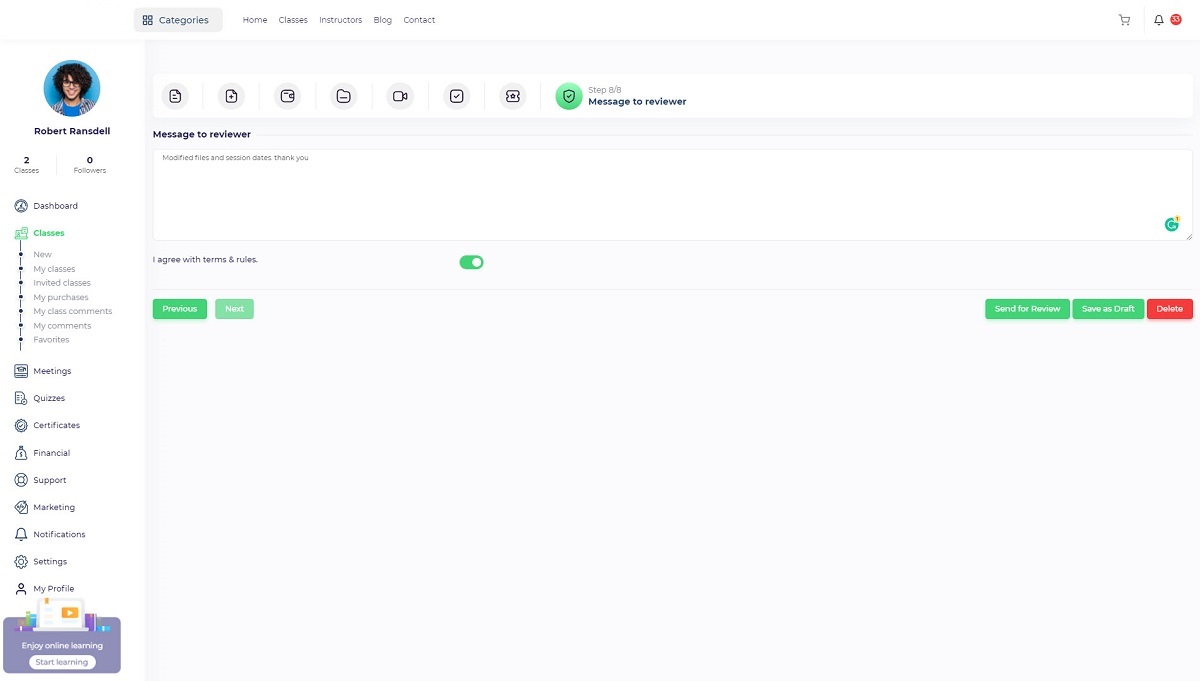 Step 8 – Confirmation:
It is important for the instructor to agree on the terms and rules at this point. An instructor can include important points in the message field for a reviewer.